Building a New Agent
Create intelligent AI agents that transform your customer interactions
Creating an AI agent in Yobi is a straightforward process that can be completed in just a few steps. Whether you're using a pre-made template or building from scratch, this guide will walk you through the entire process.
Start Creating Your Agent
Navigate to your Yobi dashboard, go to AI Studio and then click + New Agent to begin the creation process.

The AI Studio main page where you can manage and create your AI agents
You can create multiple agents for different purposes - one for sales, another for support, and even specialized agents for specific departments.
Choose Your Starting Point
Select how you want to create your agent based on your specific needs:
Use a Template
Get started quickly with pre-configured templates designed for specific industries and use cases.
Recommended for beginnersBuild from Scratch
Create a completely custom agent tailored to your unique business requirements and workflows.
For advanced customizationAvailable Templates
Yobi provides industry-specific templates to help you get started quickly:
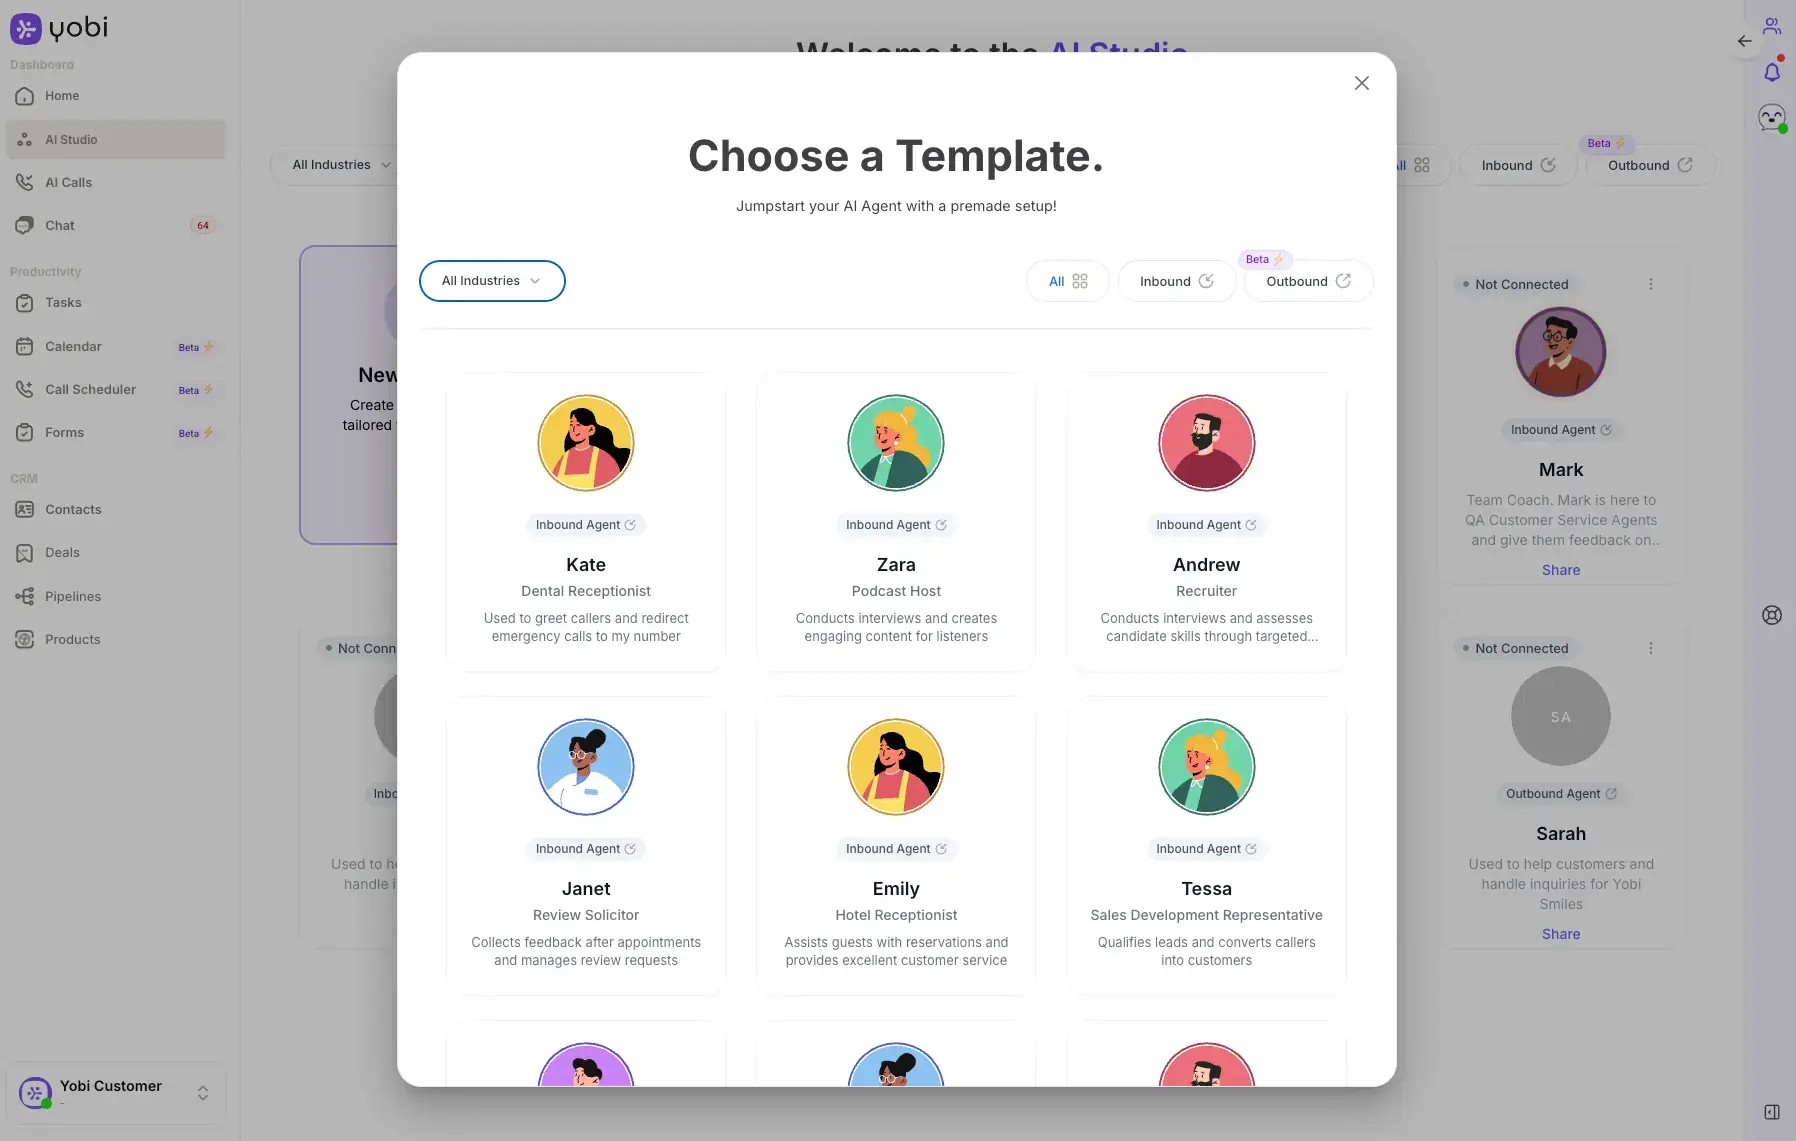
Choose from pre-built templates designed for specific industries and use cases
Set the Identity
Define your agent's core characteristics to shape how it will interact with customers.
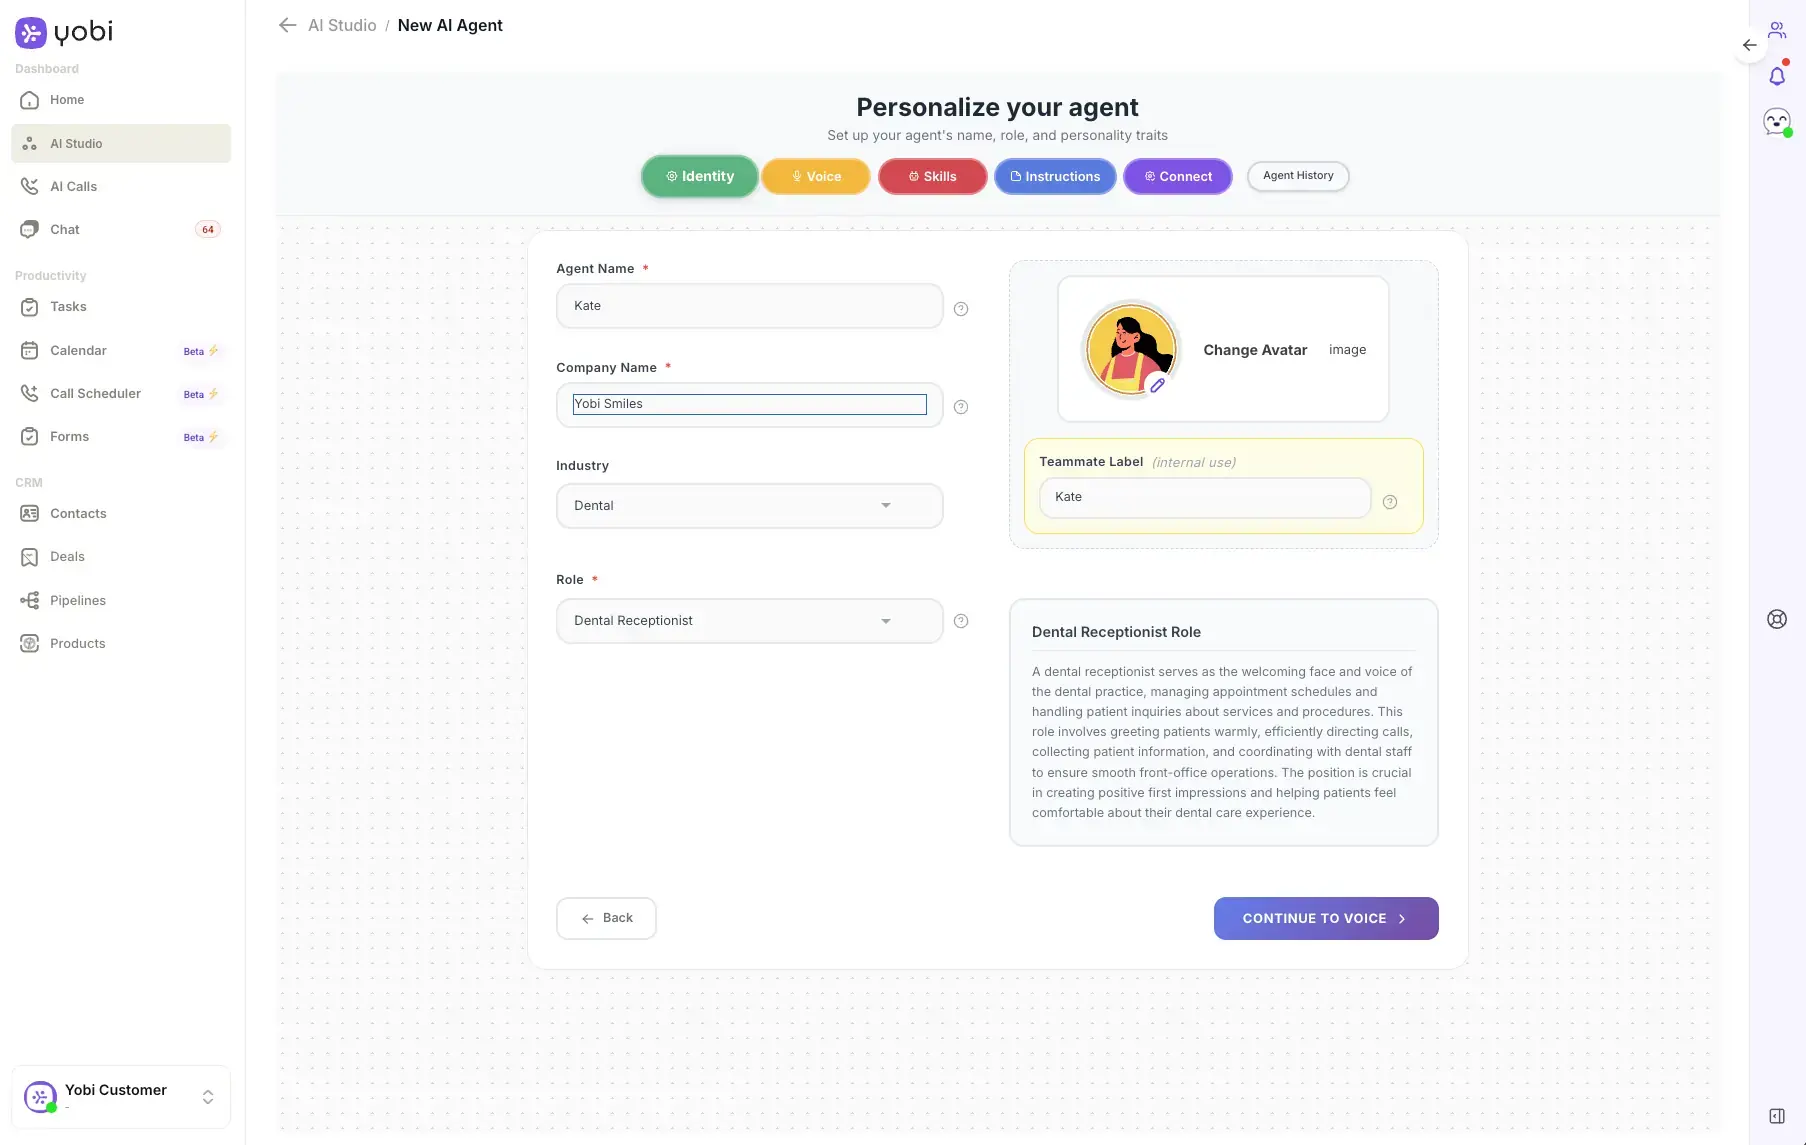
Configure your agent's identity including name, role, industry, and other key characteristics
Agent Name
The agent's name is crucial for brand identity and personalization. Choose a name that:
- Reflects the qualities you want to convey to customers
- Is easy to pronounce and remember
- Aligns with your brand personality
Role
Select or define your agent's role. Pre-made templates come with:
If none of the templates fit your needs, you can create a custom role for your AI agent.
Industry
Indicating your industry helps Yobi tailor the AI's responses to common questions and improves accuracy.
Teammate Label
This internal-use field helps your team quickly identify the agent's role and function. Create a detailed description that makes it easy for team members to understand what this agent does.